• 6604cbd7wl
  • 6604cbd49a
  • 6604cbdmjj
  • 6604cbdm2i
  • 6604cbdb0a
Leave Your Message
0%

A leaky Shower Faucet can really turn a quiet bathroom into something that's just constantly dripping—super annoying, right? You might notice water gathering around the handle, damp spots on the wall, or a thin stream of water still trickling out even after you’ve turned off the shower. Those signs usually mean you’ve got a worn-out cartridge, a damaged washer, a loose connection, or a failing seal. Figuring out exactly what's wrong is key—because swapping out the wrong part can waste time and might lead to hidden water damage over time.

From my experience, the best way to tackle this is to start with a good look and some careful observation. First, dry off the faucet, turn off the water supply, and then keep an eye on where moisture might be coming from. Using a flashlight helps spot water running behind the trim plate or pooling along pipe joints. Make sure to follow the manufacturer’s instructions and use the right replacement parts—trust me, trying to force a generic part into an unfamiliar valve usually just causes more problems. Also, keep in mind that sometimes a problem isn’t obvious. The valve could look perfectly fine on the outside, but its internal cartridge might be totally worn out.

Even small leaks can turn into big, costly headaches if water gets into drywall, flooring, or insulation. So, always take a clear photo before you start removing anything, and keep all screws and clips together so nothing gets lost. Oh, and don’t ignore slow leaks—they tend to get worse over time.

There are some cases where you’re better off calling in a licensed plumber—especially if the shutoff valve isn’t working, the pipe is hidden behind walls, or you need to open up the wall to fix things. This guide walks you through common reasons why your shower faucet might leak and offers practical steps for fixing them. It also points out common mistakes that folks new to plumbing often overlook—because even a careful repair can go sideways if you don’t identify the right valve model.

Happy fixing!
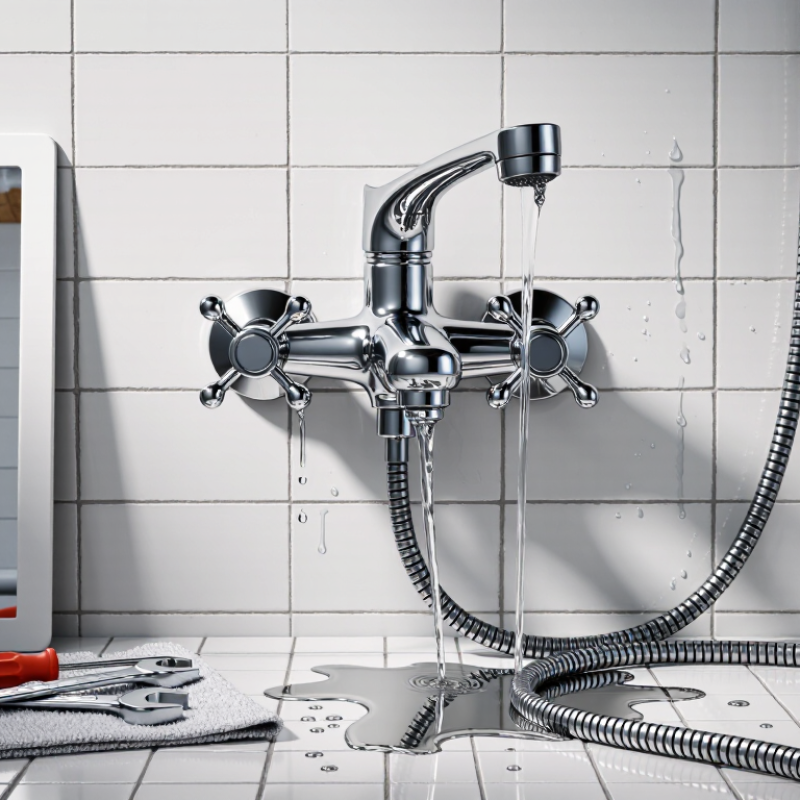
Why Is My Shower Faucet Leaking and How to Fix It?

What Causes a Shower Faucet to Leak?

A leaking shower faucet usually points to a worn internal seal, cartridge, or valve seat. Water may drip from the spout after the handle is closed. It may also seep around the handle or trim plate. Each location suggests a different cause. A slow drip often comes from mineral buildup or a damaged rubber washer. Hard water can leave chalky deposits inside the valve. These deposits prevent tight contact.

I once misdiagnosed a handle leak as a loose connection. The real problem was a cracked seal behind the trim. That mistake matters because overtightening can damage threads and create a larger leak. Turn off the water supply before removing any parts. Dry the area, then watch where fresh water appears. This simple test helps separate a supply-line problem from an internal valve problem.

Older faucets may have corroded screws, brittle seals, or mismatched replacement parts. An OEM Shower Faucet can still leak if installation is uneven or debris enters the valve. Remove visible mineral deposits carefully, and replace damaged seals with the correct size. If the cartridge feels stuck, avoid forcing it with excessive pressure. A valve body can crack more easily than expected. Check the trim plate gasket as well, since water can travel behind the wall and appear somewhere else. Persistent moisture, staining, or a soft wall surface requires professional inspection.

How to Identify the Source of the Leak

A leaking shower faucet does not always leak from the handle. The first task is locating the water’s entry point. Dry the faucet, wall plate, and shower arm completely. Then run the shower for one minute. Watch for the first wet spot, not the largest puddle.

Water appearing only while the shower runs often points to the showerhead connection, spout, diverter, or a loose wall fitting. Water dripping when the faucet is off suggests a worn cartridge, valve seal, or damaged internal washer.

Wrap a dry tissue around each joint. It reveals slow moisture better than fingertips. Check behind the decorative wall plate carefully. Water may travel along the pipe and emerge several inches away. I would not trust visual inspection alone; hidden moisture can fool even experienced homeowners.

The U.S. Environmental Protection Agency reports that household leaks waste nearly 10,000 gallons of water annually, while ten percent of homes lose at least 90 gallons daily. Those figures make a small shower leak worth investigating. The Water Research Foundation also identifies indoor plumbing fixtures as important contributors to residential water loss.

If the wall feels soft, paint bubbles, or staining spreads, stop using the shower and arrange a qualified inspection. Do not tighten every fitting blindly. Over-tightening can damage threads or compress seals unevenly. I have found that rushed repairs often create a second leak.

Record when the dripping starts, where it appears, and whether the water is hot or cold; these details help identify the failing component.

What Tools and Replacement Parts Are Needed?

A leaking shower faucet usually points to a worn cartridge, valve stem, O-ring, or loose connection. Water dripping from the spout often suggests an internal seal problem. Water around the handle may indicate a damaged stem seal or escutcheon gasket. Shut off the water supply before removing anything. Open the faucet briefly to release pressure. Place a towel over the drain and keep a small bucket nearby.

Useful tools include a flat screwdriver, Phillips screwdriver, adjustable wrench, hex key, needle-nose pliers, flashlight, and cartridge puller. A clean cloth helps protect the finish. Keep plumber’s grease and thread-sealing tape available. Do not force corroded screws. That can damage the valve body.

Replacement parts must match the faucet’s exact valve design. Common choices include a cartridge, rubber O-rings, valve stem, retaining clip, and decorative gasket. Remove the old part and photograph its position before buying replacements. Measure the cartridge length and inspect its notches.

A Custom Shower Faucet may use less common components, so check the installation guide or consult a qualified plumbing professional. I once installed a similar-looking cartridge that seemed correct, but the handle still leaked. The small alignment tab was different. My mistake was rushing the comparison.

After fitting the new seal, apply a thin layer of approved plumber’s grease. Reassemble gently, restore water pressure, and test every joint with a dry tissue. Even a tiny damp mark deserves another inspection.

How to Repair a Leaking Showerhead or Handle

A leaking shower faucet often reveals itself through one cold, persistent drip.

The U.S. Environmental Protection Agency’s WaterSense program reports that household leaks can waste nearly 10,000 gallons of water yearly. A showerhead that drips after the handle is fully closed may indicate a worn cartridge, valve seat, or damaged seal. Water leaking around the handle usually points to the cartridge or O-ring.

Turn off the water supply before opening the trim plate. Remove the handle carefully, then inspect the cartridge for scoring, mineral buildup, or cracks. Replace damaged parts with the correct size. For a leaking showerhead connection, clean the threads, replace the rubber washer, and apply suitable thread-sealing tape. Do not overtighten. It can crack the fitting. After reassembly, restore water slowly and watch the joint for several minutes. A repair may look finished and still fail later; I have found hidden drips beneath escutcheon plates during final checks.

Tips: Place a towel over the drain and keep small screws in a cup. Take a photo before removing parts. If the valve body moves, or water continues after cartridge replacement, stop and contact a qualified plumber. For property managers sourcing a Wholesale Shower Faucet, confirm replacement cartridges and seals are available. Cheap-looking compatibility can create expensive callbacks. Check the leak again the next morning.

How to Replace a Worn Cartridge or Valve

A leaking shower faucet often has a worn cartridge or damaged valve. A slow drip usually means the internal seals no longer close properly. Shut off the home’s water supply before removing anything. Open the faucet briefly to release pressure. Cover the drain, because small screws can disappear quickly.

Remove the handle, trim plate, and retaining clip or nut. Take a clear photo before pulling out the old cartridge. That small step helps during reassembly. Pull the cartridge straight out with steady pressure. Do not twist it aggressively, or debris may enter the valve body. Clean the opening with a soft cloth. Install the replacement cartridge in the same direction, then reinstall the clip, trim, and handle. Turn the water on slowly and check for leaks. I once rushed this step and reversed the cartridge, leaving the temperature control backward.

A damaged valve body requires more care. If the new cartridge still leaks, inspect the valve seat and internal surfaces with a flashlight. Deep scratches or corrosion usually require valve replacement, not another cartridge. Access may involve opening the wall behind the shower. Shut off both hot and cold lines, drain the pipes, and remove the damaged valve with suitable tools. Soldered connections need heat-resistant protection and a careful leak test. When the valve is inside a finished wall, professional help is often the safer choice. Even experienced repairs can damage hidden pipes.

Why Is My Shower Faucet Leaking and How to Fix It? - How to Replace a Worn Cartridge or Valve

Observed Symptom Most Likely Cause Recommended Repair Typical Parts Needed Difficulty Estimated Time
Water drips from the showerhead when the handle is fully off Worn cartridge, valve stem, or internal sealing surfaces Shut off the water, remove the handle and trim, then inspect and replace the cartridge or valve assembly if damaged Replacement cartridge or valve, retaining clip or nut, plumber’s silicone grease Moderate 1–2 hours
Water leaks around the handle Worn stem O-ring, loose trim, or damaged cartridge seal Remove the handle and check the stem seal, cartridge, and trim plate; replace damaged seals or the cartridge O-ring kit or cartridge, screwdriver or hex key, silicone grease Easy–Moderate 45–90 minutes
Water appears behind the wall or around the trim plate Leaking valve-body connection, failed threaded joint, or deteriorated wall seal Stop using the shower, shut off the supply, remove the trim, and inspect the valve body and connections; open the wall if necessary Replacement valve or fittings, thread sealant suitable for the connection, access-panel materials Advanced 2–6+ hours
Temperature fluctuates or the handle is difficult to turn Mineral deposits, a damaged cartridge, or a worn pressure-balancing component Remove and inspect the cartridge; clean the valve opening only as directed and install a matching replacement if necessary Matching cartridge, cleaning cloth, silicone grease, replacement retaining hardware Moderate 1–2 hours
Leak continues after a new cartridge is installed Incorrect cartridge, damaged valve-body bore, debris, or improper installation Verify the cartridge orientation and model, flush debris, inspect the bore for damage, and replace the valve if the sealing surface is defective Correct replacement cartridge, flashlight, cleaning brush, valve assembly if required Advanced 1–4 hours
Water leaks from the spout or diverter area Worn diverter seal, spout O-ring, or diverter valve Identify whether the leak is at the spout connection or diverter; replace the appropriate seal, spout, or diverter component Replacement O-ring, diverter seal, spout, or diverter valve; silicone grease Easy–Moderate 30–90 minutes
Safety and Replacement Checklist
  • Shut off the shower supply or the home’s main water supply before removing the handle, cartridge, or valve.
  • Open the faucet briefly to release trapped pressure and cover the drain to prevent small parts from falling inside.
  • Photograph the cartridge orientation before removal and match the replacement by dimensions and configuration, not appearance alone.
  • Inspect and clean the valve-body bore without scratching its sealing surfaces; apply only a thin layer of plumber’s silicone grease to compatible seals.
  • Restore the water slowly, check for leaks with the trim removed, and confirm hot and cold operation before closing the wall or reinstalling the trim.

How to Test the Repair and Prevent Future Leaks

A leaking shower faucet often points to a worn cartridge, valve seal, or loose connection. Before testing, shut off the water supply and dry the trim plate. Open the faucet briefly to release pressure. Replace the damaged part with the correct size; an ODM Shower Faucet may use different internal components than a standard model. The U.S. Environmental Protection Agency’s WaterSense program reports that household leaks waste more than 10,000 gallons of water each year. Even a slow shower leak deserves attention.

Test the repair with the handle in the off position. Watch the showerhead for five minutes. Then inspect the escutcheon, handle base, and wall connection with a dry tissue. Any fresh mark suggests remaining leakage. Turn the handle through hot, warm, and cold settings. Listen for a hiss and check whether the flow changes smoothly. Let the shower run for two minutes, then shut it off and inspect again. I sometimes retighten fittings too quickly, which can damage threads. A gentle, even fit is safer than force.

Tips: Record the repair date and part size. Check the faucet monthly. Clean mineral buildup before testing. Do not rely only on a dry floor; water can travel behind the wall. The International Association of Plumbing and Mechanical Officials emphasizes correct sealing and connection practices in plumbing installation guidance. If moisture returns, stop using the fixture and ask a licensed plumber to inspect hidden piping.

Why Is My Shower Faucet Leaking and How to Fix It?

A worn cartridge, valve stem seal, O-ring, or loose connection can allow water to escape after the faucet is turned off. The chart shows the estimated daily water loss at different drip rates, using 0.25 mL per drop and 1,440 minutes per day.

How to test the repair: Turn the water supply back on, operate the handle several times, dry the faucet and trim plate, then watch for visible drops for at least 10 minutes. A successful repair should leave the area completely dry. If leaking continues, shut off the water and inspect the cartridge, seals, valve seat, and threaded connections.

Prevent future leaks: Avoid forcing the handle, keep mineral deposits under control, replace worn seals promptly, and check the faucet and trim plate periodically for moisture.

FAQS

What usually causes a shower faucet to leak?

Common causes include worn seals, damaged cartridges, valve-seat wear, or mineral buildup. Hard water can leave chalky deposits inside the valve. These deposits prevent a tight seal.

Where might a leaking shower faucet show water?

Water may drip from the spout after the handle closes. It may seep around the handle or decorative wall plate. Each location suggests a different problem.

How can I find the leak’s exact source?

Dry the faucet, wall plate, and shower arm completely. Run the shower for one minute. Watch for the first wet spot, not the biggest puddle. A dry tissue can reveal moisture around each joint.

What does dripping when the faucet is off indicate?

Dripping with the faucet off often suggests a worn cartridge, valve seal, or internal washer. Mineral deposits may also block proper contact. The faulty part may sit behind the handle.

What does leaking only during a shower suggest?

Water appearing only during use may indicate a loose showerhead connection, spout, diverter, or wall fitting. Check each joint carefully. Water can travel behind the wall plate.

Should I tighten every fitting to stop the leak?

No. Blind tightening can damage threads or compress seals unevenly. Excessive force may even crack the valve body. I once blamed a loose connection. That was wrong.

What should I check before replacing parts?

Turn off the water supply first. Record whether the leak appears with hot or cold water. Check the seal size, cartridge condition, trim gasket, and visible mineral deposits. Incorrect replacement parts can create another leak.

When does a shower faucet leak require professional inspection?

Arrange qualified inspection if the wall feels soft, paint bubbles, or stains spread. Persistent moisture may indicate hidden water damage. Stop using the shower until the area is checked.

Can a small shower leak waste significant water?

Yes. A household leak can waste nearly 10,000 gallons annually. Some homes lose at least 90 gallons daily. A slow drip deserves attention, even when the puddle looks minor.

Conclusion

A leaking Shower Faucet is usually caused by worn seals, a loose connection, mineral buildup, or a damaged cartridge or valve. To locate the problem, dry the fixture completely and observe whether water escapes from the showerhead, handle, spout, or wall connection. Basic repairs may require an adjustable wrench, screwdrivers, pliers, replacement washers, O-rings, plumber’s tape, or a compatible cartridge. Always turn off the water supply before removing any parts and keep small components organized during disassembly.

If the showerhead leaks, clean its openings and replace damaged seals. A dripping handle often indicates a worn cartridge or valve, which should be removed carefully and replaced with the correct matching part. After reassembly, restore the water supply slowly, check every connection, and operate the handle several times to confirm smooth control and a dry fixture. Regularly cleaning mineral deposits, avoiding excessive force, and replacing aging seals can help prevent future leaks.
Nathan

Nathan

Nathan is a dedicated marketing professional at Ainsworth Smart Appliances (Zhuhai) Co., Ltd., where he brings a wealth of knowledge and expertise in the smart appliance industry. With a passion for innovative technology and consumer electronics, Nathan plays a crucial role in elevating the......
Previous How to Choose the Best China Liquid Soap Dispenser?